Are you hosting a Hocus Pocus party? Spruce up your decorations this year with these gold foil enhanced DIY decorations and popcorn holders. This is a sponsored post written by me on behalf of Cricut. All opinions are 100% mine.

DIY Hocus Pocus Party Decorations
Halloween is such a fun and festive holiday. It’s a chance to get creative with costumes, party themes and so much more. This year I wanted to do something a little different and create a custom party theme based on one of my all-time favorite Halloween movies and favorite color, pink.
With Cricut’s new Transfer Foil System I took the projects to another level by embellishing them with gold foil. The Cricut Foil Transfer System is the easiest way to apply foil to my DIY projects. The best part is that it’s pressure activated and doesn’t require any cords or heat to be used. The results are long lasting so that I can save all my party decorations to reuse year after year.
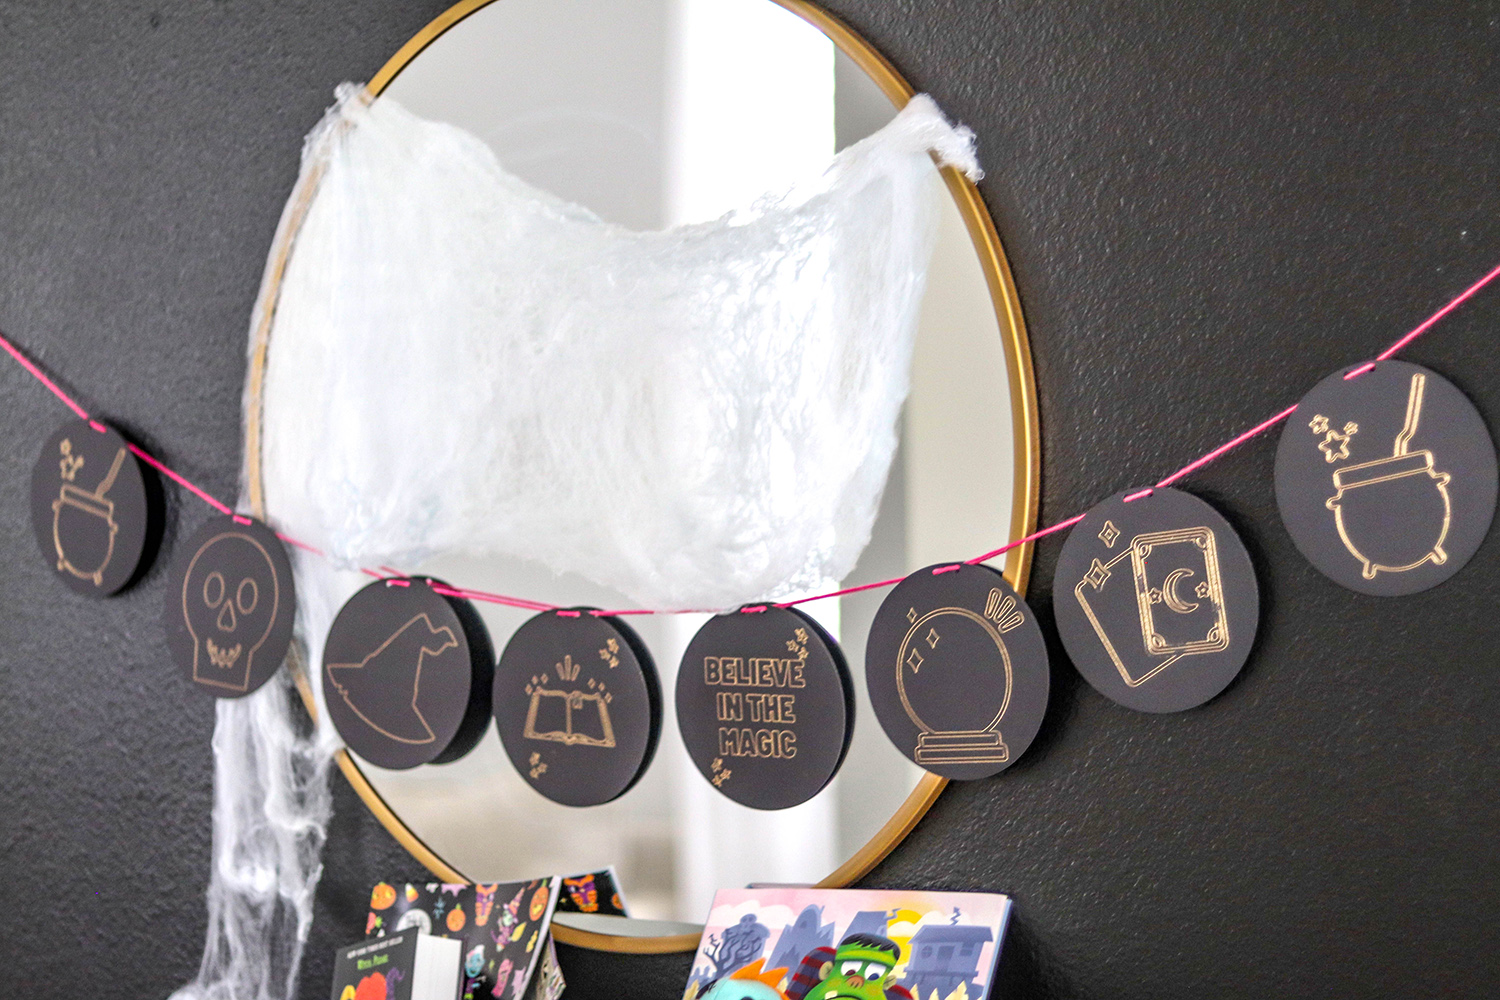
Hocus Pocus Party Banner
The Hocus Pocus party banner is probably my favorite. A party banner can instantly transform a space and this banner does exactly that. For this project you’ll need a few simple supplies that you probably already have on hand plus the new Cricut Foil Transfer System kit and Foil Transfer Sheets.
What You’ll Need
- Design Space template (linked here)
- Twine, string or yarn


Instructions
- Open the Design Space template. Select “Make It”.
- On a light grip mat, use a brayer to secure your cardstock to the mat. (You’ll need to do this twice to make the entire banner)
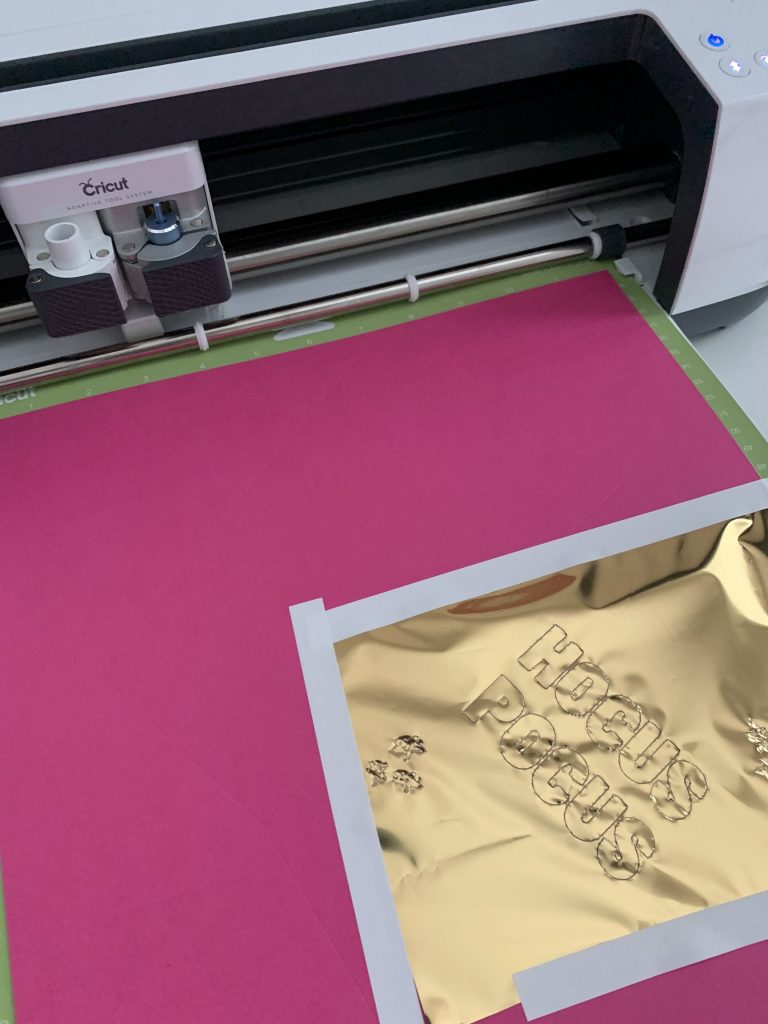
- Place your 12×12 foil transfer sheet directly on top of the cardstock. Secure the foil transfer sheet with the tape that comes in the packaging. Make sure that the foil is completely flat. If not, the foil will tear and not transfer correctly and might damage your machine.
- Once the foil is secure, insert your grip mat into your machine.
- Insert the Medium tip into your foil transfer housing by gently pushing it in.
- Once the tip is inserted into the housing, place it into side B of your machine.
- Press the “C” on your machine to begin the project.
- Once the foil is done transferring, remove the foil from the mat. Make sure to not remove the mat from your machine. (This process is a bit tricky when working with a 12×12 foil transfer sheet but it’s important to make sure that the foil doesn’t tear during the cutting process.
- After you’ve removed the tape and foil, insert your Fine Tip Blade into side B of your machine.
- Press “C” to begin cutting.
- Once cutting is complete, remove the mat from your machine and carefully remove each banner piece from the mat.
- String your yarn or twine through the holes to hang.
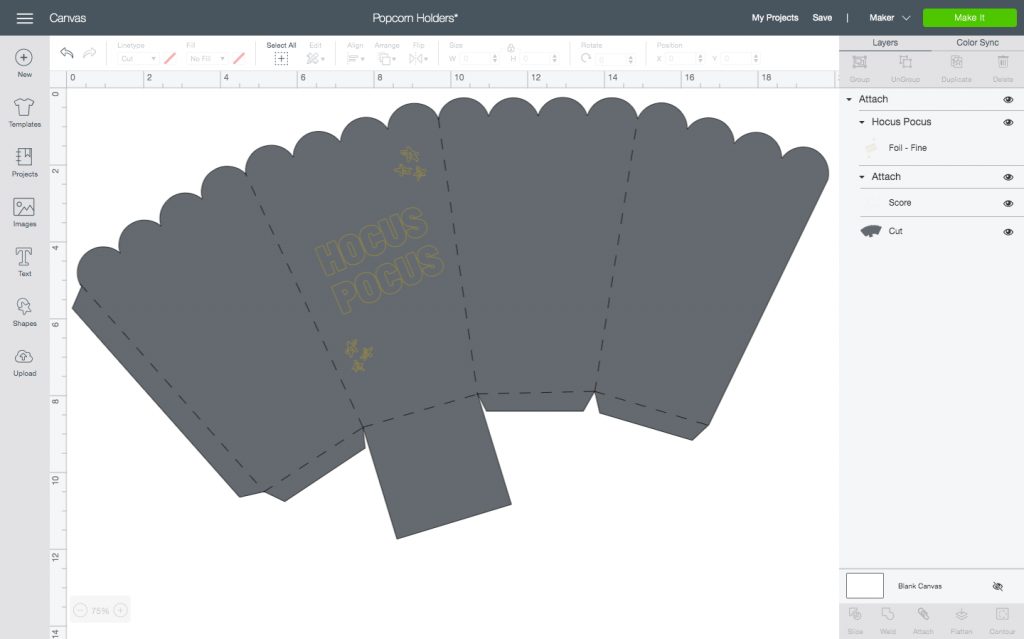
Hocus Pocus Popcorn Holders
What’s a party without snacks? These simple popcorn holders are embellished with Cricut gold foil to grab attention and sparkle on the snack table.

What You’ll Need
- Design Space template (linked here)
- 12×24 cardstock (black or pink preferred but any color will work)
Instructions
- Open the Design Space template (linked here).
- Size the popcorn holder to the size you’re wanting. The template is currently sized to an 11.5″ tall popcorn holder which is quite large and works best for older guests.
- On a light grip mat, use a brayer to secure your cardstock to the mat.
- Select “Make It” in the top right corner.
- Insert your Scoring Tip into side B.
- Press the “C” to begin scoring.
- Once the scoring is complete, place your 12×12 foil transfer sheet directly on top of the cardstock. Be sure to take a look at the numbers on your screen to line the foil up in the correct spot. Secure the foil transfer sheet with the tape that comes in the packaging. Make sure that the foil is completely flat. If not, the foil will tear and not transfer correctly and might damage your machine.
- Insert the Medium tip into your foil transfer housing by gently pushing it in.
- Once the tip is inserted into the housing, place it into side B of your machine.
- Once the housing is inserted, press the “C” to begin the foil transfer.
- After the foil transfer is complete, remove the foil transfer tip and insert your Fine Point Tip into side B.
- Press “C” to begin cutting.
- Remove the mat from your machine once cutting is complete and carefully remove the popcorn holder.
- Score the lines on the cardstock. Use a tape runner or glue stick to seal the edges.


Want to join the Cricut family but not sure which Cricut is right for you? Check out this post about The Maker and The Cricut Joy.


Leave a Reply